Saturday, February 22, 2014

Turn any Jar into a Chalkboard Jar

Turn any Jar into a Chalkboard Jar 

Materials Needed:
1 Jar (pickle jar) 
Goo Gone/rubbing alcohol (for removing labels)
1 small brush 
1 container of Plaid brand Chalboard Paint (I purchased at JoAnn Fabric) 
1 roll of blue painters tape
White Chalk 


1. Any jar (for illustration I used a pickle jar) and remove the label.
(Label can be removed using goo gone, or soaking in a mixture of rubbing alcohol and warm water) 

2. Outline desired chalk area with blue painters tape. 

3. Grab a paint brush and something to rest your brush on in between coats.

4. Outline desired area with tape, I also painted the lid.

5. Apply one coat of Paid Chalkboard paint to desired area. 

6. Wait 2 hours for first coat to dry, and apply second coat. I also coated the lid. 

7. Let the paint dry completely overnight.

8. Once the paint is dry run chalk over the area to set the paint. 


9. Rub off chalk and your ready to use your jar! 


Thursday, January 30, 2014

Make your own Lavender Infused Essential Oil

Lavender oil can be used for so many things! It is wonderful on many skin issues such as burns, stings, bites, and scrapes. Its aromatherapy properties help you relax, and its great for tension headaches, allergies and so much more! The Essential oil is more potent but the infused oil (like this recipe) works also. Just rub it on your skin and it will be absorbed. 


1. Choose a base oil, use a refined oil to attract the essential oils of the plant. Choose one that has pale color and mild scent. Olive oil, safflower oil and light sesame oil all work well. Or you can use almond oil for cosmetics, safflower or canola for general purposes, and olive oil for cooking.


2.  Two teaspoons of dried, ground herbs is equivalent to three or four sprigs of fresh herbs. Although some recipes may vary, the basic rule of carrier oil to herbs or flowers is one cup of carrier oil to every 1/4 ounce of dried or flowers. If you are using fresh flowers or herbs, it is best to bruise them (gently smush them a bit) The ratio for using fresh flowers or herbs is one cup of carrier oil to 1/4 cup of lavender. 

3. Place the oil and the herbs in the crock pot on low heat, approximately 140 degrees Fahrenheit, for six to eight hours. I used my mini crock pot and let the herbs infuse overnight. 


4. Strain the mixture - Using unbleached cheesecloth, muslin or gauze, strain into a dark colored glass storage jar or bottle.

5. Store the essential oil in a place that is cool, dark and dry - Most homemade essential oils have a shelf life of six to nine months depending on the specific blends.

Monday, January 20, 2014

How to Make Organic Mozzarella at Home

Homemade Organic Mozzarella 

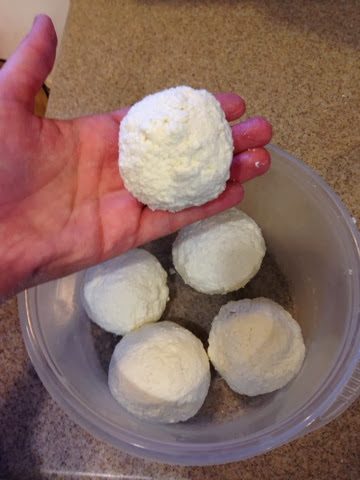
This weekend we tried our luck at making our own home made Mozzarella cheese from organic whole milk. I am an avid cheese lover and this was an easy "YES!" to our list of kitchen experiments. We followed the steps, it took us about an hour, and one gallon of milk yielded 5 medium sized balls of additive free organic salty heaven!
The ingredients you will need are as follows: 

Equipment/Ingredients:

  •  8 quart pot (or more, I used our biggest spaghetti pot) 
  •  1 Digital Kitchen Thermometer
  • 1 large knife 
  • 1 big strainer or colander
  • 1 large slotted spoon
  • 1 large mixing bowl 
  • 2 smaller bowls 
  • 1 gallon of organic whole Milk (Do not use ultra-homogenized milk or ultra-pasteurized)
  • 1/4 teaspoon liquid Rennet 
  • 2 teaspoons Citric Acid divided. 1 teaspoon is dissolved in water and the other one is sprinkled directly into the milk.
  • 1/2 cup water and 1/4 cup of water (Distilled)
  • 1 - 2 teaspoons salt.

Instructions:

1. Measure out 1/2 cup of water. Stir in the citric acid until dissolved. Measure out 1/4 cup of water in a separate bowl. Stir in the rennet until dissolved.
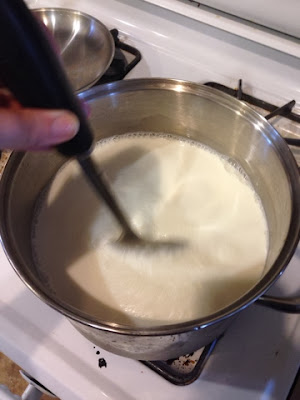
2. Pour the milk into the pot and slowly stir in the citric acid solution. Set the pot over medium-high heat and warm to 90°F, stirring gently and checking the temp with your digital thermometer. 


3. Take the pot off the heat and slowly stir in the rennet solution. Check the temp, stop stirring and place the cover on the pot and leave it alone for about 5 minutes. 
4. After about five minutes or so the milk should have set, you should be able to cut it and not have it stick to your knife or "clean break". If it is still gooey, re-cover the pot and let it sit for another five minutes. Once the milk has set, cut it into uniform curds: make several parallel cuts vertically through the curds and then several parallel cuts horizontally, creating a grid-like pattern. Make sure your knife reaches all the way to the bottom of the pot.
5. Turn on the burner and reheat the pot to about 105°F. Stir slowly as the curds warm, but try not to break them up.
6. Remove the pot from the heat and continue stirring in a smooth light motion for another 5 minutes.
7. Grab your larger bowls and use the slotted spoon to scoop the big somewhat solid chunks of curd from the yellow liquid (the whey) into a bowl. The most uniform curds can easily be scooped, the rest needs to be strained through the strainer from the whey. 
8. Continue this process until you have fully separated all of the curds from the whey. 
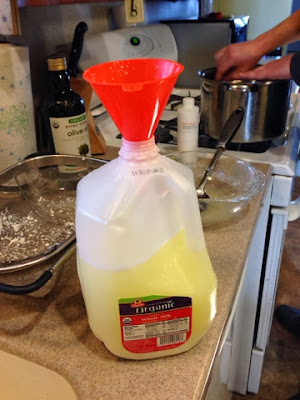
*(We kept the whey in the gallon that the milk came in to make ricotta from it later)
9. Microwave the curds for one minute, and drain the rest of the whey into your container or down the sink. Use your hands to fold the curds over on themselves a few times. At this point, the curds will be a cottage cheese texture, very separated. We used an additional strainer to squeeze out the liquid before we returned it to the microwave bowl. 
10. Microwave the curds for another 25-30 seconds and check their internal temperature with your thermometer. If the temperature has reached 135°F, continue with stretching the curds. If not, continue microwaving in 30-second bursts until they reach temperature. The curds need to reach this temperature in order to stretch.
11. Sprinkle the salt over the cheese and squish it with your hands it will start to become the texture of "cheese" you would expect, add enough salt to taste and continue stretching and squishing and form the desired size and shape of your mozzarella ball. 
12. Mix a teaspoon of salt with a cup of cool whey and pour this over the mozzarella. Cover and refrigerate.

Thursday, January 16, 2014

Snack Attack, Dr. Praeger's Spinach Littles

Snack Attack: Dr. Praeger's Spinach Littles

Dr. Praeger's Spinach Littles may say for kids on the label, but who say's the kids get the have all the fun? These gluten-free dinosaur shaped bite sized nutritious morsels are perfect for a satisfying snack any time of the day. I even found myself having them for breakfast on occasion. I found them at Giant in the frozen food section while scouring the frozen case to find a quick low carb replacement for a french fry fiending. The ingredients are perfectly "understandable" which is a valued and appreciated addition to their awesome flavor. Although there is no dipping required, I am looking forward to experimenting with home-made dipping sauces or toppings to play on the somewhat Mediterranean flavor profile. 


Tuesday, January 14, 2014

Fitness Find- Ballet Beautiful

Fitness Find

Ballet Beautiful
homepage
Mary Helen Bowers, an inspirational NYC ballet dancer has a library of very reasonably priced streaming videos available for work outs on the go. Her 15-min Ballet Beautiful Body has been perfect for my busy schedule, a quick workout wherever I have floor space & my iphone. The videos are easy to use, after purchasing, just log into Ballet Beautiful, visit "My Account" and click to play! Not only is it challenging, but cheap, and quick, three things I love in a workout! 


Paleo "Egg Salad"

Paleo Egg Salad

  • 5-10 Boiled Cage-Free Organic Eggs
  • Bag of Spring Mix 
  • Paleo "Mayo" 

Paleo egg salad (no mayo) salad  See paleo mayo recipe

Primal Ham & Bean Soup


Primal Ham & Bean Soup 

  • Bob's Red Mill 13 Bean Soup Dry Mix 
    (needs to be soaked overnight in water) 
  • 1 Ham bone (mine still had some meat on it) 
  • 1 Medium Onion 
  • 2 Cloves of Chopped Garlic 
  • 1 tsp of chopped fresh thyme 
  • 1 tsp of garlic powder
  • 1/2 tsp black pepper 
  • 2 bay leaves
  • 1 tbsp Apple Cider Vinegar
  • Leftover Ham (I chopped up & added leftover ham pieces)
  • 1/2 cup Chicken stock (organic chicken broth) 
  • 1 tsp ground mustard powder
  • 1/2 tsp tumeric

    Home made crock pot bean soup w ham
I simmer it the crock pot on low for 24-48 hours and then FREEZE IT! 
For some reason, it ALWAYS comes back better tasting, and thicker, after it's been frozen! 
I dump the big chunk into a pan and stir as it thaws.
I would wait to add salt until after its been thawed and reheated, the ham really adds enough sodium I have never added additional salt after it's been made, sometimes add black pepper to taste.

Paleo "Mayo"

Paleo "Mayo"


  • 1 egg 
  • 1 Tablespoon lemon juice 
  • 1/2 teaspoon stone ground mustard 
  • 1/2 cup light olive oil 
  • 1/2 tsp of Apple Cider Vinegar
Home made Paleo Mayonnaise  1 egg 1 Tablespoon lemon juice 1/2 teaspoon stone ground mustard  1/2 cup light olive oil Tiny Splash of Apple Cider Vinegar
I simply stirred the ingredients together in a mason jar until the texture of "mayo" was reached. 

Cauliflower "Mashed" Potatoes


Cauliflower "Mashed" Potatoes
  • 1 Head of Cauliflower
  • Organic Chicken Broth 
  • Black Pepper
  • Salt
  • Grass Fed Meadow Butter 
  • Fresh Garlic 
  • Organic Half & Half 
  • Food Processor or Hand Cheese GraterCauliflower Mashed "Potatoes"

I started with a head of cauliflower and the first batch I
used the "ricing" method by grating the cauliflower with a hand cheese grater (second batch I used a food processor MUCH easier, but if you do not have one, you can get the consistency of potato with the grater) 
Once I achieved a pretty even, "potato" consistency I put it in the pot and turned the heat on medium and started adding the other ingredients, whisking over the heat as I went: 1/3 cup organic chicken broth 1/3 cup organic half & half 2 Cloves of Minced Garlic (used garlic powder second time, same taste) Add to taste: Black Pepper, Salt, Grass fed meadow butter I would whisk, add your ingredients, and taste. There is not a whole lot of "cook time" here, its mostly just tasting it along the way until it gets to your desired level of mashed potato-ness!!


Paleo "Frosty" Milkshake


Paleo "Frosty" Milkshake
  • 1 cup Almond Milk OR Coconut Milk*
  • 10-15 ice cubes
  • 1/2 tsp Vanilla 
  • 2 Tbsp unsweetened Cocoa powder 
  • 1/2 of a Banana, Frozen**
Skinny Shake Recipe

** Texture notes: The light coconut milk won’t harden as well in the refrigerator so it won’t be as thick. You can store this and re-blend it when you ready to eat/spoon/slurp/inhale it. You can still use the light version, but you wouldn't get that “frosty” texture. The Banana doesn't have to be frozen, I just prefer the consistency and it helps maintain the true "frosty" feel in your mouth.